Yes, MintToReport helps easily find miscategorized transactions and keep your financial data up-to-date, of course, the main function is the ability to print reports. Since reports can be customized around your own personal criteria, we are going to use the basic Transaction Report for an example on how to create reports.
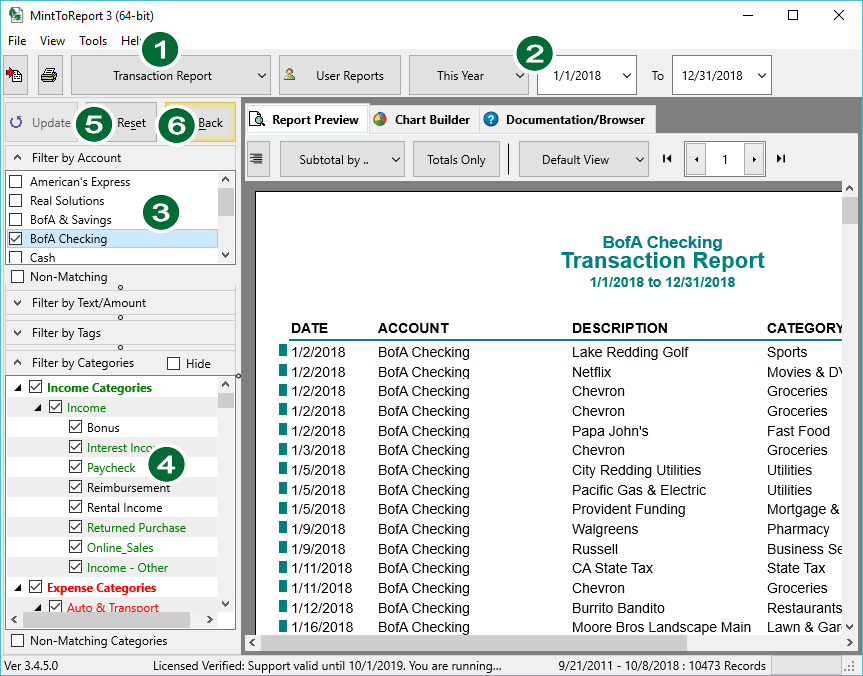
- Select the Report Type that you want to create.
- Select a Date using either the Date Range Selector or the Starting and Ending Date boxes.
See Selecting Dates for more information about how dates are used in MintToReport. - Choose your Accounts
Check the accounts you would like included in your report. If none are checked, then all accounts are displayed. - Choose your combination of tags: If you use Mints Tags, combining them with tags is a very important practice for creating precise and custom reports. Unfortunately, Mint exports its tags with each tag being one word. So if you have 2-word tags, you will see them split up in MintToReport. There is a way to fix this though: see About Mint Tags for more information.
- Choose your Categories
Select the categories you would like to be included in your report. Normally, you would organize your transaction so that only Income categories exist in the Income portion of your categories and the same for your expenses. Keep the categories that you normally won’t want to be included in your reports in the Other Category and your Transfers and Credit Card payments in your Equities category. See Filtering Categories for more information on organizing your categories. - Click on the Update Button to apply filters and create the report.
- Use the Reset Button to reset the report and all your filters to their default settings. Use the Back Button to go back to either the previous Report or Chart.